Monday, March 31, 2014

Picture Collage Wall

I can't count how many times I have just started hanging things without planning out (measuring, coordinating, planning) the wall first. Let me tell you, it NEVER works out looking good! So I finally decided to take the time to spray paint all my frames the same color, since I had a bunch of mixed matching frames, and take some of our wedding photos that were in an album and do the wall the RIGHT way!

Sometimes I can be scatter brained...ok all the time I can be scatter brained.  It's really bad. I can be working on one thing that reminds me of another thing and then walk away and do that other thing that reminded me of that thing...Sooooo, I have been trying to become a little more organized when it comes to task and decorating.  It's an inner accomplishment that I am proud to say I'm getting much better at!  I still have my moments while I'm cleaning the refrigerator one second and then brushing the dog the next, before the refrigerator is done being cleaned, but I'm trying!! Can't blame a girl. Oh well...

This is one of those project that I have been wanting to do for forever.  This is how I put my new planning skills to the test.


I first laid down a painting tarp and arranged the photos how I wanted them. This was the first arrangement that I did and it was nice, but I decided that I wanted to try one more way. Then when I decided on an arraignment I used tape to mark where the picture would hang. DON'T forget to take a picture of how you have want the pictures to look on the wall.

 I took the piece of tape and held it over the hanging hardware on the back of the picture and drew a dot with a pen.  Then I held the tape on that spot and laid the picture flat and stuck the tape to the tarp. 

When I had all my pieces if tape on the drop cloth I tacked the drop cloth to the wall and taped it tight. I started putting nails wherever there was a piece of tape. This would work much better with wrapping paper instead of a drop cloth, but thats all I had at the time. After I nailed through the drop cloth I stared from the top and pulled the nails out one by one and placed them in the wall.    

This is the second way I tried the collage. I liked this was better because it flowed way better than the first way. 


This is the finished product! You can do this too with your bare walls! this wall only cost me $25!


    Leave comments bellow to find out how I made my letter "F" and my striped painting! 

Have a Great Day!

Sunday, March 30, 2014

Onesie Dress {Tutorial}

Hey everyone! 


Happy Sunday.  I hope you take your Sundays as seriously as I do! Lazy! 


I have an awesome tutorial for you today.


The Onesie Dress!


What you will need:


A onesie the size of your child
1 Yard of Fabric of your choice for skirt and 2 inch thick strip of fabric to make the fabric flower (preferably 100% cotton)
Coordinating thread
Scissors 


This is the onesie I used to do the project. I just picked out a 3-6 month one because I am making this for a friend that is expecting in a couple weeks.  She has a lot of new born things already. I can NOT wait for her to sent me a picture of her wearing it!! 

You want to measure the circumference of the onesie. Mine was 8" so 16" around. 


Then I measured out my fabric to about 22" to account for the one inch seam allowance in the back and for the extra material I will be scrunching.  So after you measure the fabric out, you will want to set your machine to the straight stitch with the longest stitch available. You will fold over about an inch at the top of the fabric. Sew that seam across and cut the thread long so you can pull it to scrunch it. 

I have a very old Singer sewing machine that I picked up at the second hand store in my town. I got it for $25! What a steal right? It works great too.


This is the setting I put my machine at. It must be set to a straight stitch so you can pull the thread and scrunch the fabric.


This setting on my machine adjust the stitching length. You will need to adjust yours to the longest stitching length so the thread is no so tight and can be pulled.  


After you sew across you want to pull the thread on the sides to scrunch the fabric. 


Then spread out the scrunches until it's even. Make sure you measure the fabric to the measurement you took earlier. Mine needed to be 16" and I scrunched the fabric until it was at 16". Then you will want to pin your fabric to it stayes in place while you sew it to the onesie.  


Double check your measurements before you sew across the seam. Try and make your sewing as straight at you can. 


This is the finish product! You can decorate your dress with a bow or a flower, the options are endless! I decided to make a flower out of fabric with a felt middle. 

For the flower:

Take a 2 inch piece of fabric and sew it just like you did for the top of the dress. Scrunch it until it loops around in a circle and then sew the ends together. I took a piece of felt and sewed it on. I didn't like how you can see my blue thread (I should have switched it out, but I planned to glue another piece over the yellow) so I glued a piece of extra fabric in the middle with fabric glue to cover the thread.  

  
Pretty adorable, right?


Thanks for reading my tutorial! Come back tomorrow and I'll be showing you how to make a picture accent wall! Mine turned out so great! : )

Ciao!!


Tuesday, March 18, 2014

Long Winter days

It has been so hard to become motivated lately with the cold weather and all the snow.  No painting outside for me! So I search my favorite inspirational blogs like, Little Green NotebookBlue Egg Brown Nest, and View Along The Way.  The time when I feel so blaa and can't get my creativity light bulb lit, I go to the flea market stores and just look around for inspiration.  Do you ever feel like this in the winter? Ugh! So frustrating.  Ok, so I would not know what to do without these little helpful things while I'm feeling this way.  The awesome design DIY blogs, the flea market stores, the magazines, Pinterest...So my point is, never give up on your dream. Never let life run you over without a fight! It's so important to do what you love and to push yourself towards that goal a little everyday.  Here is a project I did right before winter.

This is the desk before the renovation.


This is the adorable little desk after I created it for a client. She wanted a literary themed desk for her rustic apartment in Chicago.


 I used a blend of Annie Sloan Chalk Paint in Pure White and Greek Blue.  This mix was perfect for the fun blue I was looking for to make this desk look retro and rustic.


I Mod Podged the wall paper books onto the front of the drawers, and Mod Podged the inside of the drawers with scrapbook paper.  These are such affordable options to jazz up a piece of furniture!

 
I hope everyone has a lovely week and stays warm out there!  Have faith, spring is right around the corner!!! Ciao!

Sunday, November 3, 2013

A Real Home is Never Done

I have been so busy with many projects lately I have been dying to update you guys.  The first project is my friend Jess's house that needed a little update.  She just moved into a new place that has so much character, I couldn't resist showing you this place.  It has two bedrooms and two in a half baths with two fireplaces and a very open kitchen.  She needed most of the help with shopping and picking out art (which I happen to LOVE!).  Shopping is not my favorite because I like to spend money, it's my favorite because I love to find steals and am pretty good at it too!  


The yellow chairs I found on Craigslist.com for $40 and the little pink table I refinished for her. 


I painted the whole table in Hot Pink by BEHR Premium Plus Ultra Mate then I did the top stencil and gold dipped legs in Martha Living Metallic Glaze Medallion.  then I gave this table two coats of clear wax by Annie Sloan.  I wish I would have used a gold spray paint for the gold because this Martha Living Glaze took 24 hours to dry between coats!  I could have finished it in half the time.  Oh well, you live, you learn.  


I painted the drawer stencil in acrylic paints and I did an umbra purple.  


 What kind of furniture projects have you done lately?  Have you ever painted something in Hot Pink?

Thursday, October 3, 2013

Fall Design Job

I am designing a friends new apartment this month and am having so much fun doing it! The first shopping trip was yesterday and it was a success.  I always like to start with buying art work to draw inspiration from.  Her style is bohemian and eclectic style, so this means LOTS of art work on the walls with mixing and matching frames.  We picked five pieces of art from HomeGoods and will need much, much more!  I am working on a hot pink side table for her right now with gold dipped legs, lots of stenciling and hand painting. I am thinking of doing a jute rug in the living room to bring in the neutral with two 1970's wing back chairs from craigslist.

Here are the wing back chairs I hope to get soon...


Here are some little treasures I picked up at a garage sale last weekend for this space.


This is what I have in mind so far for the living room space, what do you think?


What do you think about the window treatments from Target

I get so many ideas and inspiration from one of my favorite blogs littlegreennotebook.  Jenny Komenda is one of the most inspirational designers out there in my opinion. She does a lot of DIY's in her designs that adds creativity and flair to the room.  I love how she mixes and matches styles with different textures. She mixes modern style with antiques and complex color schemes with "I never thought I could do that, but now that you did it I have the guts to too" DIY's.  Thanks Jenny!!

I will put up another post soon with the finished hot pink and gold table.   

What is your favorite style or color combinations to use in your house?  Where do you get your inspiration from?


Tuesday, September 24, 2013


The best thing about fall approaching is all the beautiful mums everyone has by their front door.  I am in love with the fall smells and the scarf weather.  The one thing I love to do the most in the fall is paint! It is the perfect painting weather because all the humidity is gone and its cool but sunny outside.  I love to set up my all my paints outside with some pandora playing and just paint! My favorite paint to use these days, is Annie Sloan Chalk paint.  I am just obsessed with this product!! You don't have to prepare the wood before you paint.  I just dust the piece a little and go to town.  It's so easy, and you can be so creative with the colors too.  You can mix them to make other different colors and you can use Annie Sloan dark wax to distress the piece.  If you don't want to distress the piece too much you can cure the furniture with the clear wax. 

Here are two projects I have finished in the last couple days using the chalk paint...

 
This is a little black side table of my own that I refinished.  The top of this table was coming loose and I was not crazy about the black on black.  I have had this table for a long time, so it was time for a make over for this little cutie.


I painted the base in Annie Sloan Paris Grey.  I cut out a coffee mug from fabric and attached it with some really cool nail heads.  I recovered the top of this table with brown contact paper.  I love this table now because we used to forget to use a coaster on the old table and there was always a water ring left behind.  On this new table we just set our drinks on the fabric coffee mug : )


The table turned out pretty cute!

The next project I finished this week is a side table I picked up at Goodwill for $11.65! The thing that attracted me to this table was the patina legs and the carving on the front. I really likes the marble top too because it will last and the table is solid wood which is quality and will look great painted.  


As you can see it needs to be dusted a little and it needed a repair at the top were the marble insert will lay.  I glued that and waited 24 hours for it to dry.  The next day I stared painting.


I really love how this table turned out.  I used Pure White and Greek Blue in Annie Sloan Calk Paint.  I then applied two coats of the clear wax.  I have not used the dark wax yet, which I picked up last week.  On the next project I will try and be a little more brave and use it. :)


The wax takes three days to dry and then this baby is ready to sell! Let me know if you have any questions.

I hope you enjoyed : ) Happy Tuesday everyone!  


Saturday, September 21, 2013


I have been working on a wing back chair for months now on and off.  I have completely stripped the chair to it's bone because I want to teach myself how to reupholster a chair from start to finish.  The only time you really need to strip a chair to the frame is if there is a structural repair or a spring that needs to be replaced. I have learned so much along this journey! I have taught myself how to do an eight way spring tie, how to attach webbing, and how to attach the burlap.  I am now a sitting duck, waiting for supplies to come in the mail.  So I thought I would take this time to show you the chair before and after I stripped it.  I also have some other refinishing projects I have been working on in the mean time while I wait for my supplies. Not one minute goes to waste around here!

Here is the wing back chair before I stripped the fabric off...


Moo has to pose for a shot! 


I ripped the fabric off the back of the chair first, then the outside arms, followed by the inside wings, and so on. The million tacks and staples I removed all went into a little cup I had close by.  This job is very time consuming and tedious, but so worth it!


This is a picture of the chair after I finished removing the outside and inside of the fabric.  Some pieces of furniture will have many layers of fabric. Some upholsters that have reupholstered furniture do not want to go through the trouble of removing all the extra fabric. So, they just apply the fabric over the old fabric.  This is a faster approach to reupholstering, but it's not the most efficient and/or quality way.


The coolest part about ripping old furniture apart is you always find a piece of history!  This particular chair was made in Boston, MA.  I found this so interesting because this order slip was very old (there was no date on the slip) and was in such good shape.  Just though I would share this little piece of information from the past.


 I removed all the springs on the bottom and continued to remove all the springs on the back......


I still have a couple of tacks to remove to clean up the frame, but this is the chair completely stripped!

 
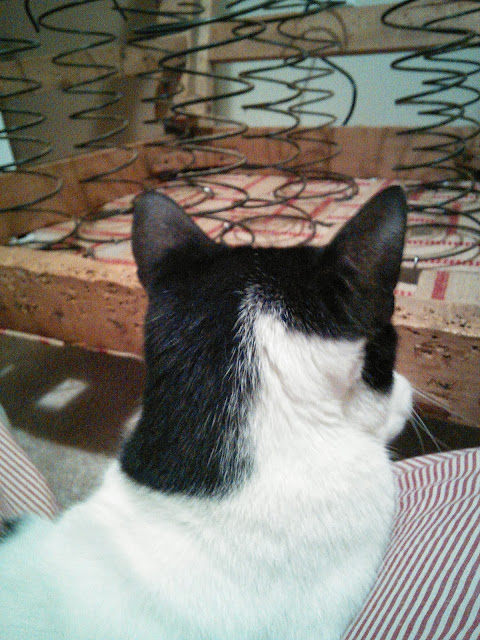
This is Moo the famous cat helping me attach the springs.


This is after I accomplished the eight way hand tied springs.  Upholsterers call this the eight way spring tie because the system uses tempered steel coil springs tied at eight points for comfort and proper seat support. If you look closely the spring tie twine crosses the springs like a cut pie eight times. 


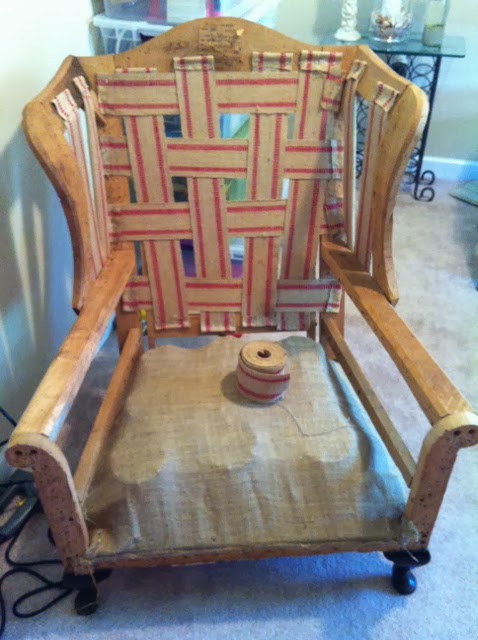
Here is the chair with all the webbing excluding the arms.  I must attach the horse hair, muslin, and cotton before adding the webbing on the arms.  


I will report back as soon as I have made some more progress on the project.  Thanks for reading!