

I have been working on a wing back chair for months now on and off. I have completely stripped the chair to it's bone because I want to teach myself how to reupholster a chair from start to finish. The only time you really need to strip a chair to the frame is if there is a structural repair or a spring that needs to be replaced. I have learned so much along this journey! I have taught myself how to do an eight way spring tie, how to attach webbing, and how to attach the burlap. I am now a sitting duck, waiting for supplies to come in the mail. So I thought I would take this time to show you the chair before and after I stripped it. I also have some other refinishing projects I have been working on in the mean time while I wait for my supplies. Not one minute goes to waste around here!
Here is the wing back chair before I stripped the fabric off...


I ripped the fabric off the back of the chair first, then the outside arms, followed by the inside wings, and so on. The million tacks and staples I removed all went into a little cup I had close by. This job is very time consuming and tedious, but so worth it!

This is a picture of the chair after I finished removing the outside and inside of the fabric. Some pieces of furniture will have many layers of fabric. Some upholsters that have reupholstered furniture do not want to go through the trouble of removing all the extra fabric. So, they just apply the fabric over the old fabric. This is a faster approach to reupholstering, but it's not the most efficient and/or quality way.

The coolest part about ripping old furniture apart is you always find a piece of history! This particular chair was made in Boston, MA. I found this so interesting because this order slip was very old (there was no date on the slip) and was in such good shape. Just though I would share this little piece of information from the past.

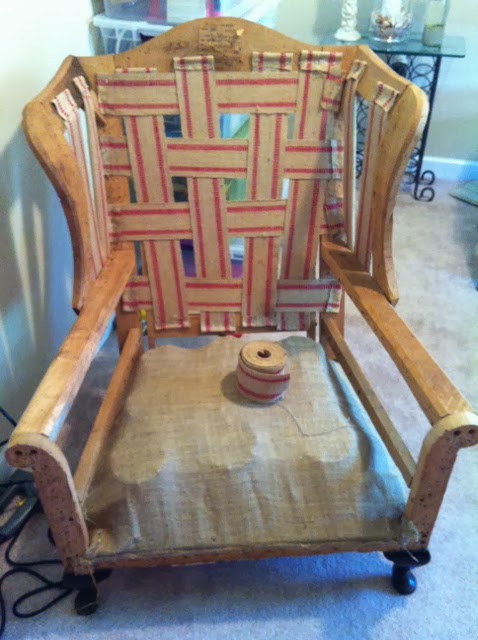
I removed all the springs on the bottom and continued to remove all the springs on the back......

I still have a couple of tacks to remove to clean up the frame, but this is the chair completely stripped!


I will report back as soon as I have made some more progress on the project. Thanks for reading!

 |
Moo has to pose for a shot! |

I ripped the fabric off the back of the chair first, then the outside arms, followed by the inside wings, and so on. The million tacks and staples I removed all went into a little cup I had close by. This job is very time consuming and tedious, but so worth it!

This is a picture of the chair after I finished removing the outside and inside of the fabric. Some pieces of furniture will have many layers of fabric. Some upholsters that have reupholstered furniture do not want to go through the trouble of removing all the extra fabric. So, they just apply the fabric over the old fabric. This is a faster approach to reupholstering, but it's not the most efficient and/or quality way.

The coolest part about ripping old furniture apart is you always find a piece of history! This particular chair was made in Boston, MA. I found this so interesting because this order slip was very old (there was no date on the slip) and was in such good shape. Just though I would share this little piece of information from the past.

I removed all the springs on the bottom and continued to remove all the springs on the back......

I still have a couple of tacks to remove to clean up the frame, but this is the chair completely stripped!

This is Moo the famous cat helping me attach the springs.


This is after I accomplished the eight way hand tied springs. Upholsterers call this the eight way spring tie because the system uses tempered steel coil springs tied at eight points for comfort and proper seat support. If you look closely the spring tie twine crosses the springs like a cut pie eight times.


Here is the chair with all the webbing excluding the arms. I must attach the horse hair, muslin, and cotton before adding the webbing on the arms.

No comments:
Post a Comment